This video was made to inform and inspire about NASA's future Orion Missions
Rocket launch video and some photos are owned by NASA
|
This video was made to inform and inspire about NASA's future Orion Missions Rocket launch video and some photos are owned by NASA
0 Comments
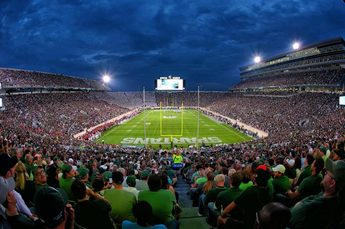
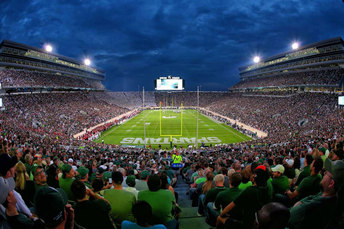
Below, I have taken the uneven Spartan Stadium and put a press box on both sides, creating evenness. This, surprisingly, is not that hard to do, if you know how to do it, that is. However, I have not found a great place that explains this, so I will explain it for you. Before staring, you must have a photo that is centered, so that the copied object doesn't look distorted. Below, I have a photo that is taken from the center of the end zone of Spartan Stadium. First, select the area you wish to move, then make it its own layer. Then, go to the top and click edit-> transform-> flip horizontal. This should get the object to look right, now all you have to do is move it into position and touch things up a bit.
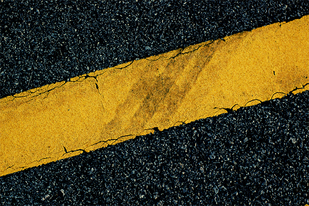
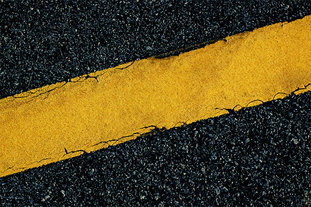
In the example below, there is a skid mark on the yellow line. Using Photoshop, I removed the skid mark using the Content-Aware Fill tool and touched up on some other blemishes. This is a very useful tool, and easier to do than you probably think. Here is a helpful link: http://www.howtogeek.com/howto/43621/how-to-remove-people-and-objects-from-photographs-in-photoshop/ Hopefully this is helpful to you trying to remove objects, and hope you find it easy, like I have.
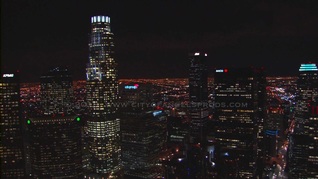
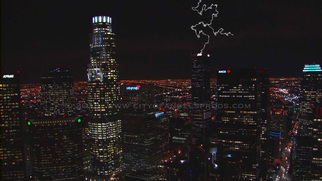
As you can see in the pictures below, I have added lightning to this gorgeous LA skyline. It's really quite simple if you have someone walking you through it. Which is why I have added this link: http://photoshopcafe.com/tutorials/lightning/lightning.htm Now of course, the lightning in the below edit does not look great, but it can be easily touched up to look more realistic.
|
ArchivesAuthorJason Gigliotti Categories |
 RSS Feed
